
8(903)201-21-74
ООО "ЧетыреДатчика"
|
Оператор: 8(903)201-21-74 ООО "ЧетыреДатчика" |
|
Оператор: 8(903)201-21-74 ООО "ЧетыреДатчика" |
Главная страница Dvr features and function 1 ... 7 8 9 10 11 12 13 14 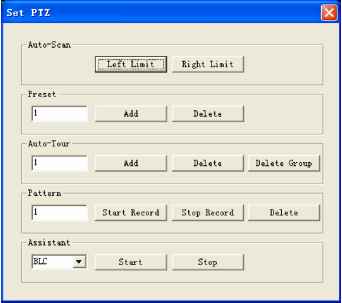 Figure 7-12 7.2.2.4 Auto Scan In Figure 7-12, move the camera to you desired location and then click left limit button. Then move the camera again and then click right limit button to set a right limit. 7.2.2.5 Pattern In Figure 7-12, you can input pattern value and then click start record button to begin PTZ movement. Please go back to Figure 7-11 to implement camera operation. Then you can click stop record button. Now you have set one pattern. 7.2.2.6 Preset In Figure 7-12, move the camera to your desired location and then input preset value. Click add button, you have set one preset. 7.2.2.7 Auto tour In Figure 7-12, input auto tour value and preset value. Click add button, you have added one preset in the tour. Repeat the above procedures you can add more presets in one tour. 7.2.2.8 Assistant You can select the assistant item from the dropdown list. See Figure 7-13. 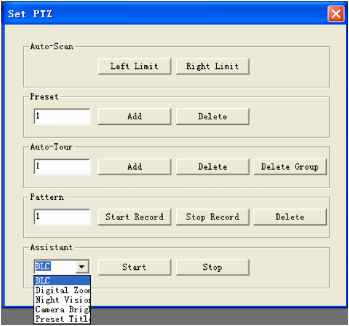 Figure 7-13 7.2.3 Color Click color button in section 3, the interface is shown as Figure 7-14. Here you can select one channel and then adjust its brightness, contrast, hue and saturation. (Current channel border becomes green). Or you can click default button to use system default setup. 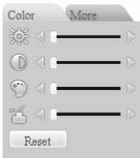 Figure 7-14 7.2.4 Picture Path and Record Path Click more button in Figure 7-14, you can see an interface is shown as in Figure 7-15. 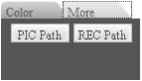 Figure 7-15 Click picture path button, you can see an interface is shown as in Figure 7-16. 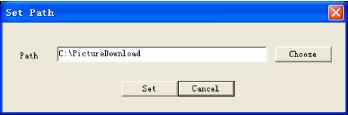 Figure 7-16 Click record path button, you can see an interface is shown as in Figure 7-17. 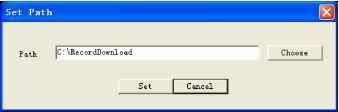 Figure 7-17 7.2.5 Menu Interface Switch Put your mouse on the PTZ control bar until you see the following icon. See Figure 7-18. Figure 7-18 Left click your mouse and then drag it to the channel control status bar. You can see the two menus interface switched. See Figure 7-19. You can compare the following interface with Figure 7-6. 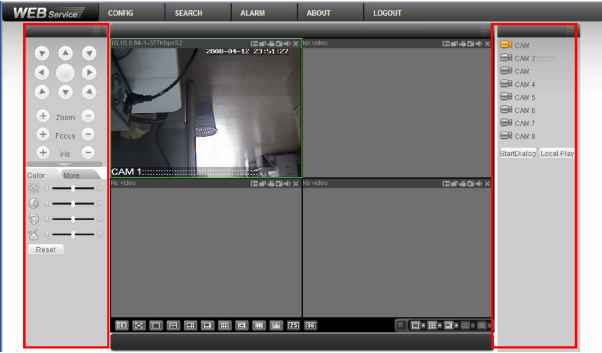  7.3 Configure In the main window, click config button, you can see an interface is shown as in Figure 7-20.  Figure 7-20 7.3.1 System Information Click device configuration button, you can see the following interface. See Figure 7-21. 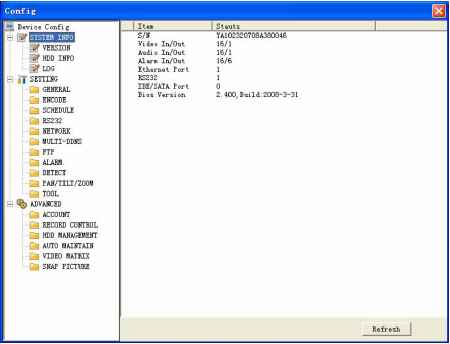 Figure 7-21 Version Click version button, you can see corresponding HDD information for your reference. See Figure 7-22. 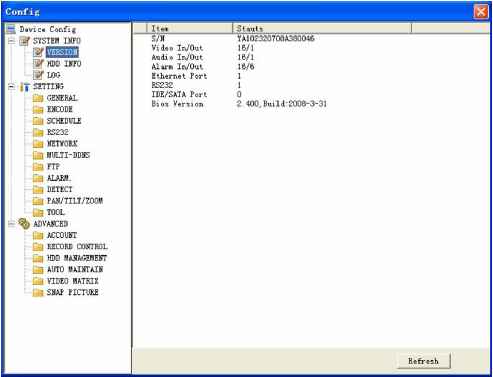 Figure 7-22 HDD Information Here you can view HDD amount, HDD status, total volume and free space. See Figure 7-23. 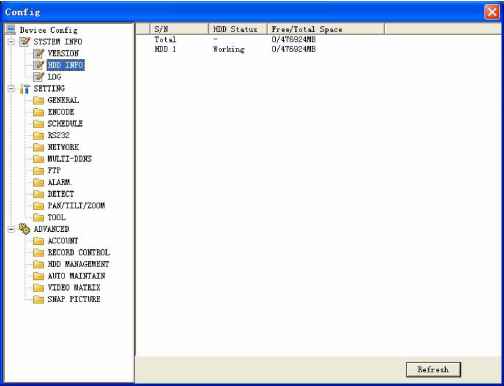 Figure 7-23 Log Click log button, you can see an interface is shown as in Figure 7-24. Here you can view current device log information. 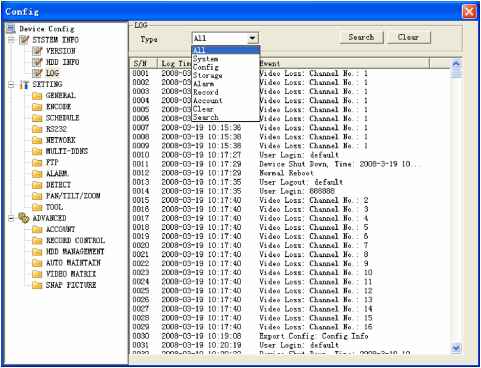 7.3.2 Setting Figure 7-24 Setting includes the following items: General Encode setup Schedule RS232 Network MUL-DDNS FTP Alarm setup Detect Pan/Tilt/Zoom Tool Please note: setups for different device series may vary. Please refer to the corresponding users manual. General General interface is shown as in Figure 7-25. System time: Here is for you to modify system time. Please click Save after your modification Data format: Here you can select data format from the dropdown list. Data separator: Please select separator such as - or /. Time format: there are two options: 24-H and 12-H. HDD full: there are two options: stop recording or overwrite the previous files when HDD is full. Pack duration: Here you can select file size. Default setup is 60 minutes. Device No.: when you are using one remote control to manage multiple DVRs, you can give these DVRs serial numbers respectively. Click address button in your remote control and then input the correct device number, now you can control the DVR now. Video standard: PAL. (for your reference only) 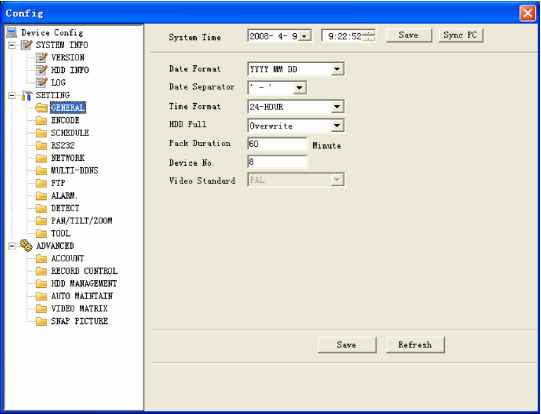 Figure 7-25 Encode Encode setup includes the following items. See Figure 7-26. Here you can select Channel: Here is for you to select a channel. Channel name: Modify channel name. Data stream: Regular and extra data stream. AV enable: Video/Audio. System only displays video by default. You need to manually enable audio function. Bit rate: There are two options: CBR and VBR. You can only set video quality in VBR mode. Frame rate: The value ranges from 1f/s to 25f/s (PAL) and 1f/s to 30f/s (NTSC). Compression: There are two options: H.264 and MPEG 4. Resolution: D1/HD1/DCIF/CIF Quality: The value ranges from 1 to 6. The level 6 is the best video quality. 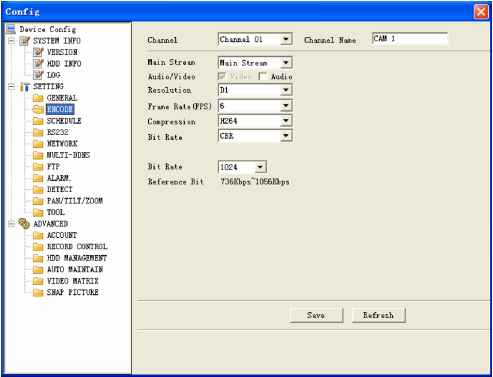 Figure 7-26 Schedule Schedule includes the following interface. See Figure 7-27. When DVR boots up, it is in 24-hour continuous record. In this interface you can set record type, record time and period. Record type includes regular record(R), motion detection record (M) and alarm record (A). Channel: select the channel number you desire. Week: you can select from the dropdown list. Or you can select at the bottom of the interface. Prerecord: system can record the three to five seconds video before activating the record operation into the file.(Depends on data size) Period: There are six periods for you to set. Please click set button of the corresponding period. See Figure 7-28.Please note all the setup here shall be in one day. E.g. 00.00 to 24.00.  Figure 7-27 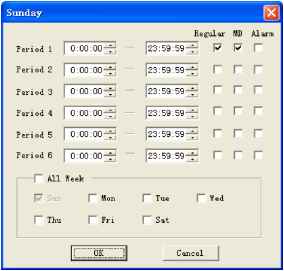 Figure 7-28 Tip: After you finished setup for one channel, you can click save as button, system pops up the following interface. See Figure 7-29.Now you can copy one channel setup to other channels. 1 ... 7 8 9 10 11 12 13 14 |