
8(903)201-21-74
ООО "ЧетыреДатчика"
|
Оператор: 8(903)201-21-74 ООО "ЧетыреДатчика" |
|
Оператор: 8(903)201-21-74 ООО "ЧетыреДатчика" |
Главная страница Dvr features and function 1 ... 9 10 11 12 13 14  Figure 7-46 Click add group button, you can see the following interface. See Figure 7-47. Here you can add one new group, and then select corresponding rights for the whole group accounts. 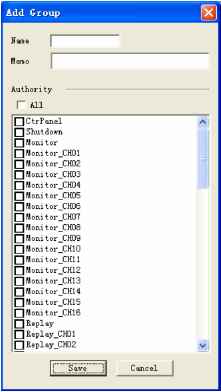 Figure 7-47 Click add user button, you can see the following interface. See Figure 7-48. Here you can input a new user and then select corresponding rights. Please note one user must belong to one group and user right shall not exceed group rights limit. 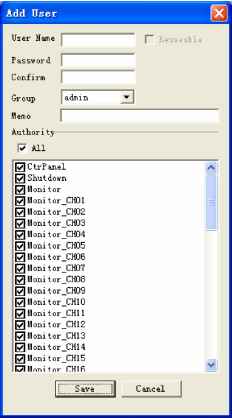 Figure 7-48 Record Control Record control interface is shown as in Figure 7-49. Record control: Here you can enable record status for corresponding channel. Alarm output channel: Here you can select alarm output channel. DVR output channel can not support large overload. (It shall be less than 1A). Too heavy current may result in relay damage. Please use contactor if necessary. 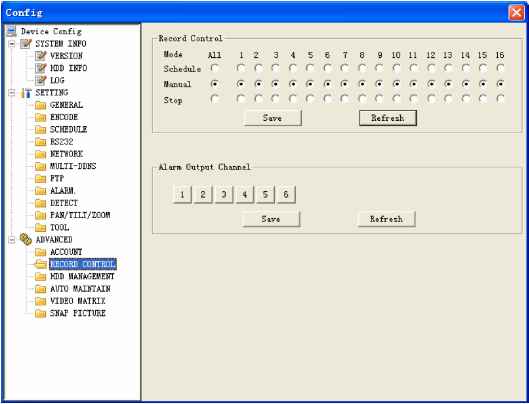 Figure 7-49 HDD management This function needs DVR device supported. Please select the HDD first and then you can see the items on your right become valid. You can check the corresponding item here. See Figure 7-50. After you completed setup, please click control HDD button, you can see the DVR begins restarting. 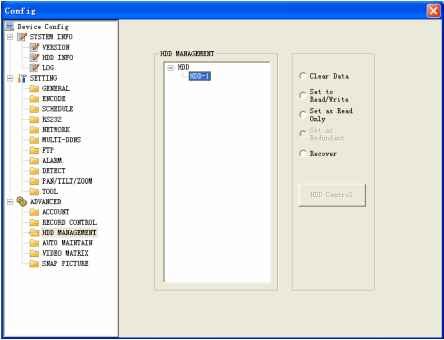 Figure 7-50 Auto maintenance Auto maintenance interface is shown as in Figure 7-51. Here you can enable auto reboot or auto delete old files function. (Need DVR supported) 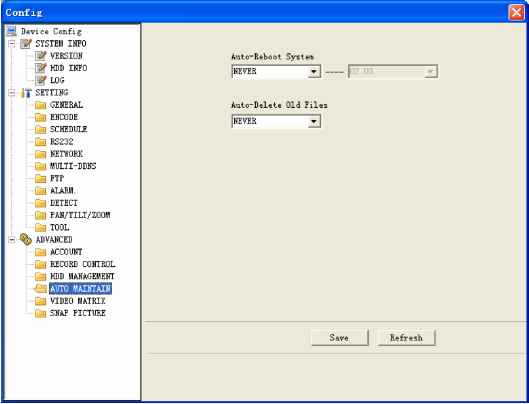 Video Matrix Video matrix interface is shown as in Figure 7-52. Please note this function needs DVR supported. 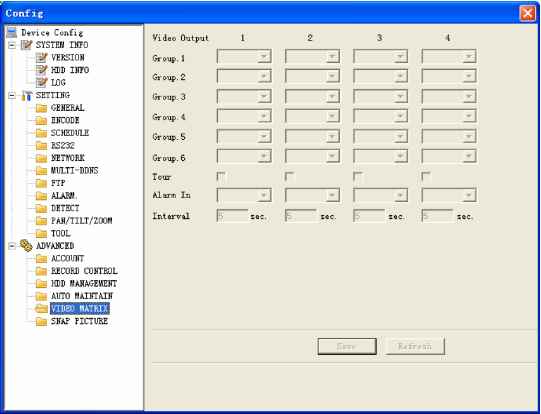 Figure 7-52 Snap Picture Snapshoot interface is shown as in Figure 7-53. Please note this function needs DVR supported. 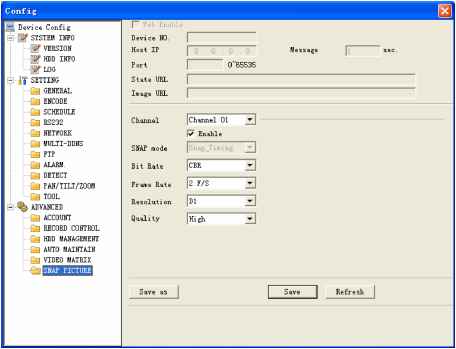 7.4 Search Here you can select video type, channel number and time to search the file you want. Click search button, the interface is shown as below. See Figure 7-54 Please use page up/down key to view the search results. Double click file name, you can view the file and system will automatically backup the image in you installation directory. 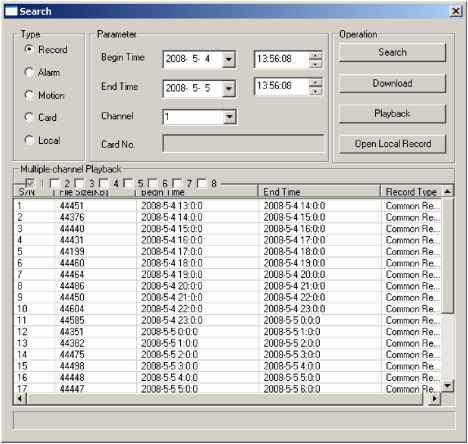 Figure 7-54 In the search result interface, you can select one or more files to download to your local PC. The playback bar is shown as below. See Figure 7-55. 1: Play 2: Pause 3: Stop 4: Slow play 5: Fast play 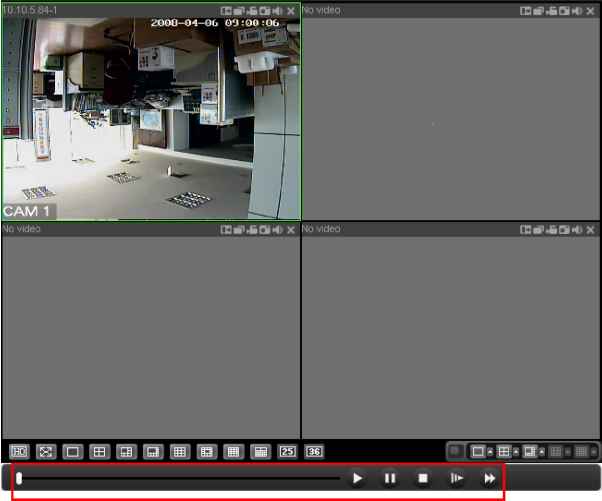 Figure 7-55 7.4.1 Download You can select one or more files you want to download and then click down load button. System pops up a dialogue box asking you specify directory. See Figure 7-56. 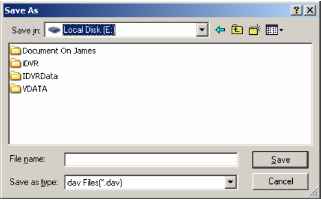 Figure 7-56 Then you can input file name and click save to backup file in your local pc. During the download process, there is a process bar for you reference and you can see download button becomes stop button. See Figure 7-57.  Figure 7-57 7.5 Alarm Here you can set alarm type and alarm prompt audio file. See Figure 7-58. 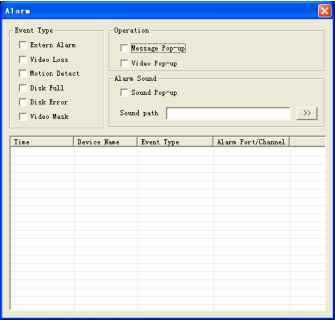 Figure 7-58 7.6 About Click about button, you can view current web client information. See Figure 7-59. 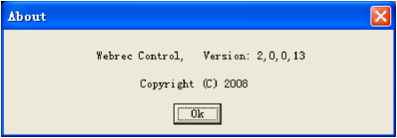 Figure 7-59 7.7 Log out Click log out button, system goes back to log in interface. See Figure 7-60.  Figure 7-60 7.8 Un-install Web Control You can use web un-install tool uninstall web.bat to un-install web control. Please note, before you un-installation, please close all web pages, otherwise the un-installation might result in error. 8 Enterprise Professional Surveillance System In this chapter, we introduce how to add devices and how to enable monitor function. For detailed operation, please refer to enterprise professional surveillance system users manual. 8.1 Log in Double click enterprise profession surveillance platform icon ( ).lf it is your first time to use the system, you can see the following interface. See Figure 8-1. 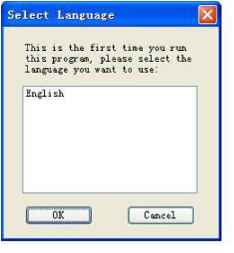 Figure 8-1 After selecting a language, you can see the following interface. Here you can input user name and password to log in you selected server. The log in interface is shown as in Figure 8-2. If it is your first time to use the system, you need to click add button to add a device first. Default central control server name is Local. System default username and password both are admin. Note: For security reasons please modify your password after you first logged in. 1 ... 9 10 11 12 13 14 |