
8(903)201-21-74
ООО "ЧетыреДатчика"
|
Оператор: 8(903)201-21-74 ООО "ЧетыреДатчика" |
|
Оператор: 8(903)201-21-74 ООО "ЧетыреДатчика" |
Главная страница Dvr following and features 1 ... 5 6 7 8 9 10 11 12 7.2.1 Real-time Monitor In section 2, left click the channel name you want to view, you can see the corresponding video in current window. For detailed function key information, please refer to Figure 7-7. 1 u i i i 1 2 3 4 5 6 Figure 7-7 1: Digital zoom: Click this button and then left drag the mouse in the zone to zoom in. right click mouse system restores original status. 2: Change show mode: resize or switch to full screen mode. 3: Local record. When you click local record button, the system begins recording and this button becomes highlighted. You can go to system -.local record to set video file path. 4: Capture picture. You can snapshoot important video. All images are memorized in system client folder \download\picture (default). 5: Audio :Turn on or off audio.(It has no relationship with system audio setup ) 6: Close video. Please refer to Figure 7-8 for main stream and extra stream switch information. 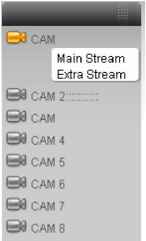 Figure 7-8 Refresh You can use this button to refresh camera list. Start Dialogue You can click this button to enable audio talk. Local Play Click local play button, system pops up the following interface for you to select local play file. See Figure 7-9. 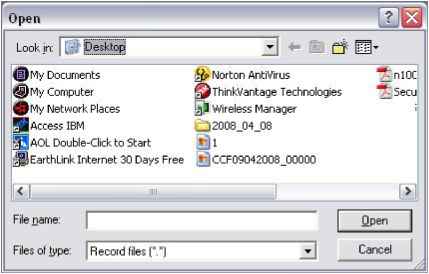 Figure 7-9 7.2.2 PTZ Before PTZ operation, please make sure you have properly set PTZ protocol. (Please refer to chapter 7.3.2 Setting-> Pan/Tilt/Zoom). Click PTZ button, the interface is shown as in Figure 7-10 . 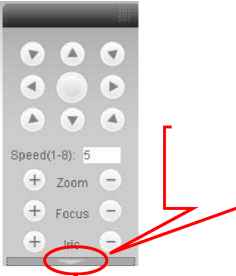 You can click this icon to display or hide the PTZ control platform. Figure 7-10 7.2.2.1 Direction key and 3D positioning key In Figure 7-10, there are eight direction keys. In the middle of the eight direction keys, there is a 3D intelligent positioning key. Click SIT button, system goes back to the single screen mode. Drag the mouse in the screen to adjust section size. It can realize PTZ automatically. 7.2.2.2 Speed System supports eight-level speed. You can select from the dropdown list. Speed 2 is faster than speed 1. 7.2.2.3 Zoom/Focus/Iris Here is a sheet for you reference.
Then click triangle icon in Figure 7-10, you can see the following interface. See Figure 7-11. 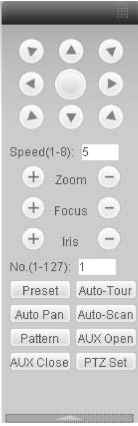 Figure 7-11 In Figure 7-11, click PTZ setup button you can see the following interface. See Figure 7-12. 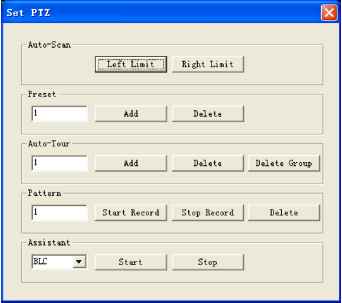 Figure 7-12 7.2.2.4 Auto Scan In Figure 7-12, move the camera to you desired location and then click left limit button. Then move the camera again and then click right limit button to set a right limit. 7.2.2.5 Pattern In Figure 7-12, you can input pattern value and then click start record button to begin PTZ movement. Please go back to Figure 7-11 to implement camera operation. Then you can click stop record button. Now you have set one pattern. 7.2.2.6 Preset In Figure 7-12, move the camera to your desired location and then input preset value. Click add button, you have set one preset. 7.2.2.7 Auto tour In Figure 7-12, input auto tour value and preset value. Click add button, you have added one preset in the tour. Repeat the above procedures you can add more presets in one tour. 7.2.2.8 Assistant You can select the assistant item from the dropdown list. See Figure 7-13. 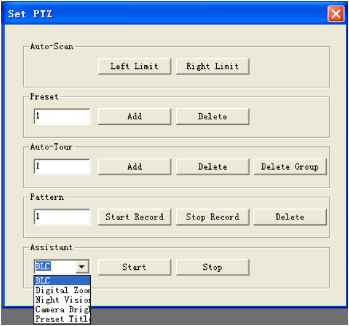 Figure 7-13 7.2.3 Color Click color button in section 3, the interface is shown as Figure 7-14. Here you can select one channel and then adjust its brightness, contrast, hue and saturation. (Current channel border becomes green). Or you can click default button to use system default setup. 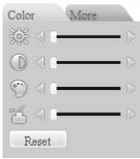 Figure 7-14 7.2.4 Picture Path and Record Path Click more button in Figure 7-14, you can see an interface is shown as in Figure 7-15. 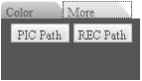 Figure 7-15 Click picture path button, you can see an interface is shown as in Figure 7-16. 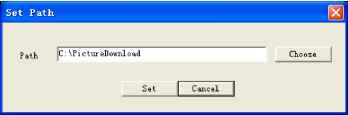 Figure 7-16 Click record path button, you can see an interface is shown as in Figure 7-17. 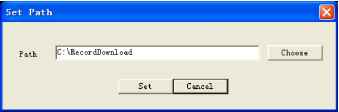 Figure 7-17 7.2.5 Menu Interface Switch Put your mouse on the PTZ control bar until you see the following icon. See Figure 7-18. Figure 7-18 Left click your mouse and then drag it to the channel control status bar. You can see the two menus interface switched. See Figure 7-19. You can compare the following interface with Figure 7-6. 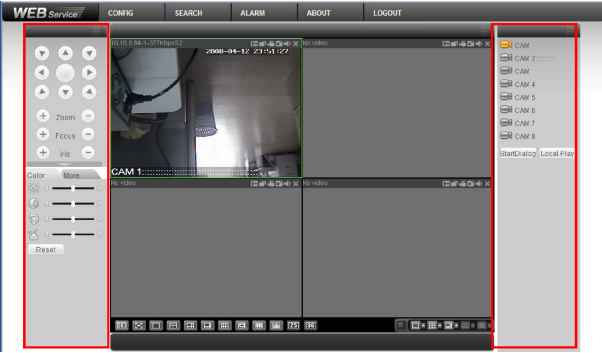  7.3 Configure In the main window, click config button, you can see an interface is shown as in Figure 7-20. 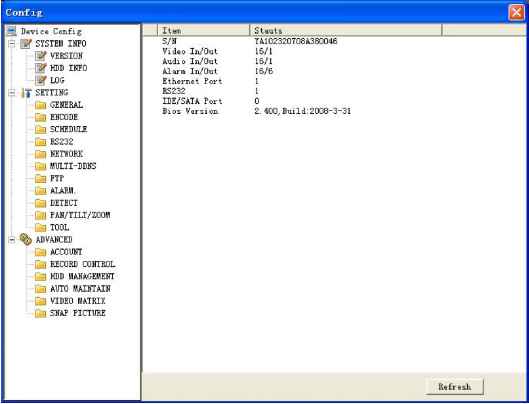 Figure 7-20 7.3.1 System Information Click device configuration button, you can see the following interface. See Figure 7-21.  Figure 7-21 Version Click version button, you can see corresponding HDD information for your reference. See Figure 7-22. 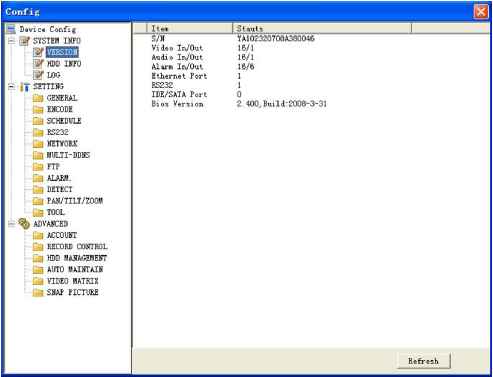 Figure 7-22 HDD Information Here you can view HDD amount, HDD status, total volume and free space. See Figure 7-23. 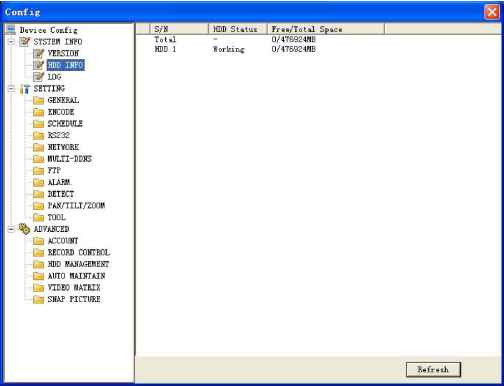 Figure 7-23 Log Click log button, you can see an interface is shown as in Figure 7-24. Here you can view current device log information. 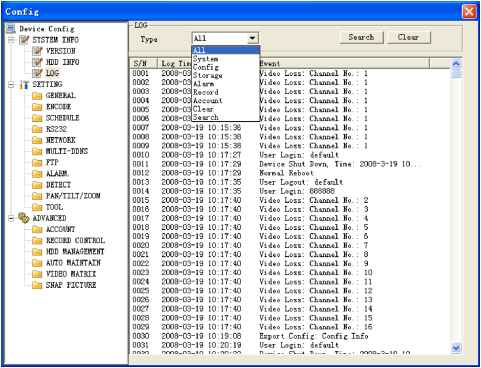 7.3.2 Setting Setting includes the following items: General Encode setup Schedule RS232 Network MUL-DDNS FTP Alarm setup Detect Pan/Tilt/Zoom Tool Please note: setups for different device series may vary. Please refer to the corresponding users manual. General General interface is shown as in Figure 7-25. System time: Here is for you to modify system time. Please click Save after your modification Data format: Here you can select data format from the dropdown list. Data separator: Please select separator such as - or /. Time format: there are two options: 24-H and 12-H. HDD full: there are two options: stop recording or overwrite the previous files when HDD is full. Pack duration: Here you can select file size. Default setup is 60 minutes. Device No.: when you are using one remote control to manage multiple DVRs, you can give these DVRs serial numbers respectively. Click address button in your remote control and then input the correct device number, now you can control the DVR now. Video standard: PAL. (for your reference only) 1 ... 5 6 7 8 9 10 11 12 |