
8(903)201-21-74
ООО "ЧетыреДатчика"
|
Оператор: 8(903)201-21-74 ООО "ЧетыреДатчика" |
|
Оператор: 8(903)201-21-74 ООО "ЧетыреДатчика" |
Главная страница Nvr/dvr/hybrid ndvr 1 2 3 4 ... 14 NVR/DVR/Hybrid NDVR Online Tecti Support Site  Click on Product Overview to access NUUOs official website www.nuuo.com for the latest product information. You may also visit our Online Tech Support Site for FAQ. Click on Install if you wish to start system installation immediately, or Click on Documents for extra info. 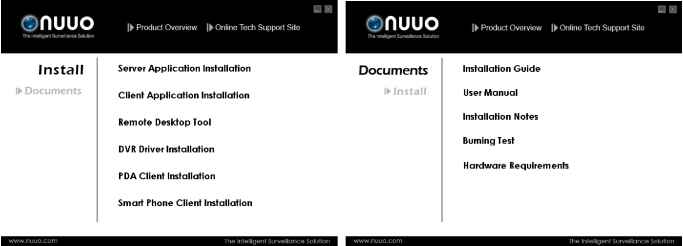 If you are installing the system on multiple PCs, install the appropriate software for each PC: - Server Application: All functions of NVR/DVR/Hybrid NDVR systems including Main Console, Playback, Remote Live Viewer, Backup, and Verification Tool. - Client Application: Remote functions of NVR/DVR/Hybrid NDVR systems including Playback, Remote Live Viewer, Backup, and Verification Tool. - Remote Desktop Tool: The tool to access main console and setup configuration remotely. - DVR Driver: The tool to detect the type of capture cards and install the proper driver automatically. - PDA Client: Client application for PDA devices. - Smart Phone Client: Client application for smart phone devices. - Related Link: Click for more information including User Manual, Installation guide and Hardware Requirements. The following section describes the installation of each element of the Intelligent Surveillance System. onuuo NUUO NVR DVR NDVR System Software IServer Application Installation MdnConsole, Plovtjock, Bemote Live Vi&wer, Boch.p Client Application Installation Remote Desktop Tool DVR Driver Installation PDA Client Installation Smart Phone Client Installation related ljnk !► Step 2: Select Server Application Installation. Step 3: There are 4 system types listed in the System Setup Tool window. Choose one and select Next. - NUUO IP Surveillance System/Trial System - NUUO MPEG-4 Hybrid System - NUUO H.264 Hybrid System - NUUO Full D1H.264 Hybrid System Note: The Setup Tool will detect the type of capture cards installed on PC and enable the system options automatically. Step 4: Select Next to continue. 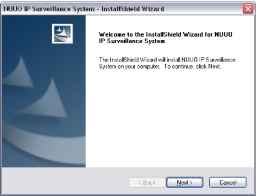 Step 5: Check the option I accept the terms of the license agreement, select Next to continue. NIIUO IP suiveillfmf e s/?tem - Intallsliiem wizai d license agreement Please read the following license agreement carefully. 0( Tt !nd User License Agreement ( EULA ) not inilall or use the software until you have read and accepted all cl the license ms. Permission to use the software is conditional upon your agreeing to the license ms. Installation or use of the software by you will be deemed to be acceptance of ! license terms Acceptance will bind you to the license terms in a legally enforceable ntract with NUUO Inc. SOFTWARE LICENSE AND LWITED WARRANTY Ttii i n iirHHmMntti4нип lu tin-нп11и-нг, and NUUO Inc ( NUUO ) By using :his software. vou agree to become bound by the terms of this agreement. ©Ui HpirtiHlHmi il rhnll НГ1 H дгнмшнп! Оi do not accept the terms of the license agreement installs hield- < Back JP Nenl > \ Step 6: Enter the appropriate information, select Next to continue. Server Application Installation Step 1: Insert the Installation CD. Run autorun.exe from the CD-ROM directly to start the installation. 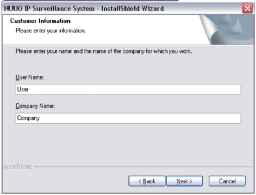 Step 7: Choose Complete or Custom setup type. NIIUO IP Suiveillfmf e S/?tem - IntallSliieM Wizai d Setup Type Select the setup type to irstall.  Please select a setup type. All program features will be installed IRequires the most disk spaoe.] О Custom Select which program features you want installed. Recommended for advanced users. < Back JP Nent > \ \ Cancel COMPLETE SETUP TYPE Installs all program features into the default directory. Check Complete, and then select Next. All program features will be installed. [COMPLETE SETUP requires the most disk space.] CUSTOM SETUP TYPE Allows you to install the system to a preferred directory and select whichever program feature(s) to install. [Recommended for advanced users] Check Custom, and then select Next. Select Change if you wish to modify the installation directory. Select the feature(s) for setup to install, select Next. 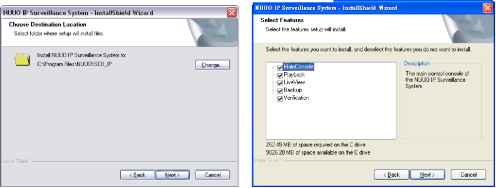 step 8: Select Install to start the installation. NIIUO IP Siiiveillnnce System - InstnllSliield Wizni d Ready to Install the Piogram The fflzard is ready to begin instelletion.  Click Install to begir the irstalletlor. If you went to review or change etiy ot your itistallaticti settings, click Beol(, Click Cancel to OKit the vvizard. < Back IL Step 9: Check Enable Update Notification Function to allow us to notify you automatically when there are software updates (Recommended). This will help keep your system up to date. The updater will also collect info from your system that will be used for future system improvements.  hJUUO Upgrade Notification Function Agreement This is an agreement between you, the end user, and NUUO Inc. ( NUUO ). By using this function, you agree to become hound by the terms of this agreement. If you dont agree to the terms of agreement, se uncheck the Enable Upgrade Notification Function . What info is collected? When hJUUO Upgrade Notification is enabled, it will collect info related to the upgrade process, including hardware specificatiors of your computer, 0 Enable Upgraide Nolilication Funiclion Step 10: Select Finish, installation complete. NIIUO IP Trial System - IntallShieM Wizai d  Installs hield Wizaid Complete The inslaliShielid Wizard has successluliy inslalled NUUO IP Trial System. Click Finish to eHit the wizard. < Back IFinishij Cancel Client Application Installation step 1: Insert the Installation CD, run autorun.exe from the CD-ROM to start the installation. onuuo DVR NDVR System Software Server Application Installation IClient Application Installation Remole Playback, Remole Live View , Remote Backup appliMiiuh nemoreuesKiopiAAI- DVR Driver Installation PDA Client Installation Smart Phone Client Installation Related Link !► Step 2: Select Client Application Installation. Step 3: Select Next to continue. 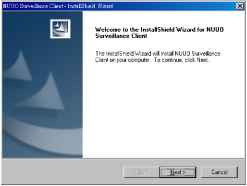 Step 4: Check I accept the terms of the license agreement: select Next to continue. license agreement Please reaid Ihe following license agreement carefully. Enid User License Agreeirient ( EULA )  IDo not install or usetlie software until you liave read and aciiepteiJ all of the liiiense terms. Permission to use the software is conditional upon your agreeing to the license terms Installation or use of ttne software by you will tie deemed to be accefitance ol ttie license terms Acceptamie will bind you to the liiiense terms in a legally enloniealale contract wittn tJUUO Inc. SOFTWARE LICENSE AND LIMITED WARRANTY This is an agreement between you, the end user, and МШО Inc. fNUUO ). By using -ft arr- , - j a irpr-tr lih---mr-1 iiiiniJ li, tt ptnrr-rt ttiis agreement. I p jilo nof accepFthe ter Step 5: Enter your information and select Next to continue. 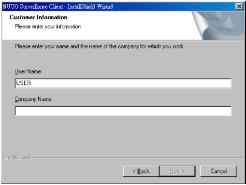 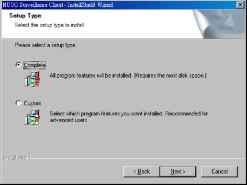 COMPLETE SETUP TYPE Installs all program features into the default directory. Check Complete, and then select Next. All program features will be installed. [COMPLETE SETUP requires the most disk space.] CUSTOM SETUP TYPE Installs the system to a preferred directory and allows you to select whichever program feature(s) to install. [Recommended for advanced users] Check Custom option and then click Next. Select Change to modify the installation directory where setup will install, select Next. Select the features setup will install, select Next after confirmation. 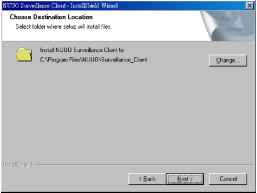 Select Features Select the features setup will install.  Select the features you iant to install, and deselect the leatures you do not wart to install. Watch the recorded video, view ard/or search lor unusual events and recorded system inlormation. LiveView Backup [Verification 151.73 MB ot space required or the С drive S028.18 MB of space available on the С drive i- <iack \ NeHt> j [ Cancel Step 7: Select Install to begin the installation. Ready to Install Ihe Progiam The wizard is isndy to begin irstallation. lEll Click Install to begin the installation. I f you want to review or charge any of your installatior settings, click Back. Click Cancel to ewit the wizard  <Back [,llQsi:a(r j Cancel Step 8: Select Finish when install is complete. step 6: Select Complete or Custom setup type and select Next to continue. onuuo NUUO NVR DVR NDVR System Software Server Application Installation Client Application Installation Remote Desktop Tool : ::n use remote desklop tool lo access main console rjp contigurgtion rcmot&ly. DVR Driver Installation PDA Client Installation Smart Plione Client Installation Step 2: Select Remote Desktop Tool. Step 3: Select Next in the Install Shield Wizard dialog box. lEll Wdcame (□ Ihe InsldlShield Wizard fai NUUO Remole Desktop Viewer The InstallShJeld Wizard will install NUUO Remote Desktop Viewer on your compuler. To eonlinue. click NcKt.  Step 4: Check the option I accept the terms of the license agreement. Select Next. License Agreement Please reaid the loiiowing iicense agreemeni careluiiy.  User License Agreemeni ( EULA ) install or use tPie software until you Piave read and aiiepted all of tPie liiense Permission to use tlie software is lionditional upon your agreeing to tlie license Installation or use of tlie software lay угэи will be deemed to be aiiceptamie of license terms. Acceptance will Isind you to the license terms in a legally enloreealsle act with NUUO Inc. LICENSE AND LMTED WARRANTY agreement between you, the end user, and NUUO Inc ( NUUO ) By using software, you agree to become bound by the terms of this agreement. I do not accept ttie terms ol the license agreement Step 5: Enter your information, select Next. 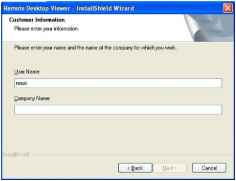 Remote Desktop Tool Remote Desktop Tool allow user remote to access Main Console System and setup configuration. step 1: Insert the Installation CD. Run autorun.exe from the CD-ROM directly to start the installation. step 6: Select Complete or Custom setup type. Remote Desktop Viewet - InstallSliielil Wizatil Setup Type Select the setup type to install Please select a setup type All prograrfi features will be installed Requires the most disk space.] OCuston Back II Ment > \ [ Cancel COMPLETE SETUP TYPE Install all program features into the default directory. Check Complete, and then select Next. All program features will be installed. [Requires the most disk space.] CUSTOM SETUP TYPE Install the system to a preferred directory. Select program feature(s) to install. [Recommended for advanced users] Check the option Custom, select Next. Select Change to select folder setup will install files. Select the features setup will install. Choose Desfinatiiin Locqtwn Select folder wheta setup vril inrtalHe*. Install RwntAe Oesfclop Vmwi tiy CAPiogrsm FiteI\lwn blиfcЛHmal!Лw Change.. tBach ЩЫяЛП [ Cancel 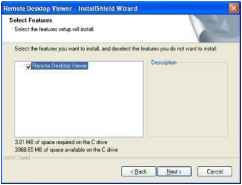 Step 7: Select Install to start the installation. Ready to Install the Praam The wizard is ready to begin insidi Cllsklnstaiito begin I iSxk I instaS it [ Cancel Step 8: Select Finish after installing the system completely. onuuo NUUO NVR DVR NDVR System Software Server Application Installation Client Application Installation Remote Desktop Tool DVR Driver Insfrallation .-oltalion tool will deiecl be type of capture cards 31 tie proper diver automalically. PDA Client InstallatioTT Smart Phone Client Installation Step 2: Select DVR Driver Installation. Step 3: In the NUUO Driver Setup dialog box, select Next. 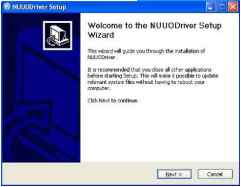 Step 4: Check I Agree to continue. Step 5: Installing NUUO driver. 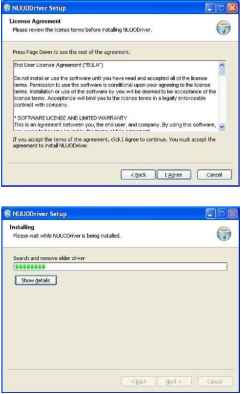 DVR Driver Installation Driver Install Tool help user to auto detect type of capture card and install corresponding drivers. step 1: Insert the Installation CD. Run autorun.exe from the CD-ROM directly to start the installation. NUUO NVR/DVR/Hybrid NDVR System step 6: Click Finish after installing the system completely, and then choose to reboot now or later. 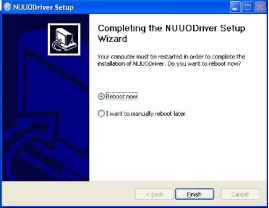 1 2 3 4 ... 14 |