
8(903)201-21-74
ООО "ЧетыреДатчика"
|
Оператор: 8(903)201-21-74 ООО "ЧетыреДатчика" |
|
Оператор: 8(903)201-21-74 ООО "ЧетыреДатчика" |
Главная страница Nvrmini 2 user manual 1 ... 11 12 13 14 15 16 17. Select the time slot which you want to backup. 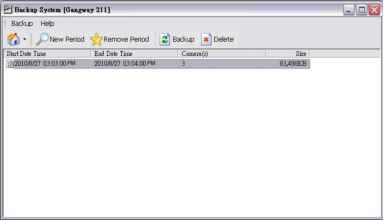 18. Click the Backup button. 19. Select the way and directory you want to save the backup data. 20. Check the Include Playback application option, which will add Playback application into the backup folder. 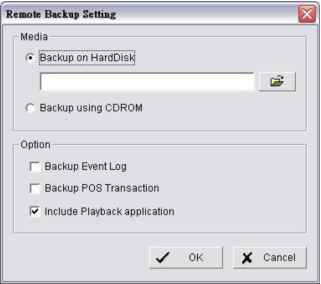 21. Click the OK button. 8.2 Backup the Recorded Video through Windows Explorer 1. Find your unit through Windows Explorer (insert plus the IP address of your unit) 2. Open the public folder. 3. Insert the name and password of the administrator. 4. Select the volume and open the VIDEODATA folder. 5. Copy the date folder which you want to backup to your desktop / laptop. 8.3 Backup the Recorded Video through FTP 1. Find your unit through Windows Explorer (insert ftp: pl us the IP address of your unit) 2. Insert the name and password of the administrator. 3. Select the volume and open the VIDEODATA folder. 4. Copy the date folder which you want to backup to your desktop / laptop. 8.4 Playback the Backup Records 8.4.1 With Playback Application 1. Use the Backup System application to backup your records. 2. Check the Include Playback application option, which will add the Playback application into the backup folder. 3. Open that folder. 4. Double-click the Playback application icon. 5. Select the recorded data to play back. 8.4.2 Without Playback Application 1. Use the Playback function to backup your records. 2. Put your backup folder into the program folder of NVRmini 2. (Default directory is C:\Program Files\NUUO\NVRmini2 .) 3. Startup > NUUO NVRmini 2 > Playback System. 4. Click the Open Record button. 5. Select the recorded data to play back. 8.5 Delete the Recorded Video 8.5.1 With Backup Application 1. Startup > NUUO NVRmini 2 > Backup System. 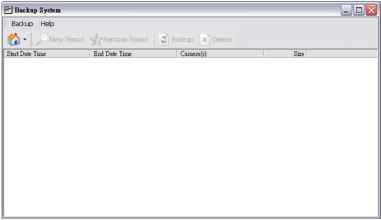 Click the Remote Server Site button to set up remote server. 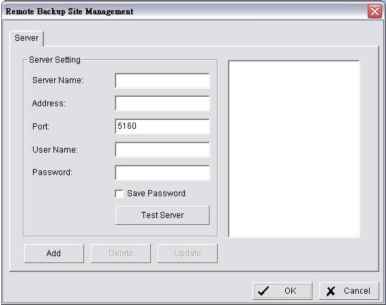 3. Insert the name of your unit. 4. Insert the IP address of that unit. 5. Modify the port if necessary. 6. Insert the user name. 7. Insert the password. 8. Check the Save Password option. 9. Click the Test Server button to test the connection between the local application and the remote unit. 10. Click the Add button to add this unit into the remote server list. 11. Click the OK button. 12. Click the ▼ button next to Remote Server Site button, and select one of servers you added. 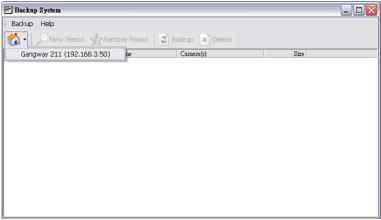 13. Click the New Period button to select the record date. 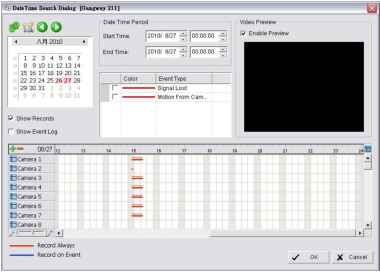 14. Set the Start Time and End Time. (or highlight the video records which you want to delete) 15. Select the cameras you want to delete the records. 16. Click the OK button. 17. Select the time slot which you want to delete. 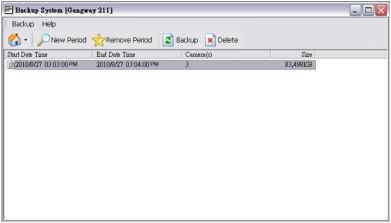 18. Click the Delete button. 19. Confirm the check dialog. 8.5.2 Without Backup Application 1. Find your unit through Windows Explorer (insert plus the IP address of your unit). 2. Open the public folder. 3. Insert the name and password of the administrator. 4. Select the volume and open the VIDEODATA folder. 5. Select the date folder which you want to delete. 6. Delete the folder. In order to keep the system stable, do not delete recorded data from the day in which you do the delete process.  9.Verification Tool The Verification Tool verifies whether the data created by the system has been tampered with. Its the process by which a digital watermark (a digital signature) is added to each recorded video frame to ensure its authenticity. There are three types of data could be verified by Verification Tool: 1. File in (.dat) (.264) format will be displayed as * 2. File in (.avi) (.asf) format will be displayed as 3. File in (.bmp) (.jpg) format will be displayed as ь*. 9.1 Execute Verification Tool 1. Startup > NUUO NVRmini 2 > Verification Tool. 2. Verification Tool Overview Add File Add Folder Remove File Select All Video Preview /  Play Pause Stop Add File: Insert the single file to list for verification. Add Folder: Choose the folder with multiple files to list for verification. Remove File: Remove indicated file(s) from list. Select All: Select all files in list for verification. Choose the file type first before selecting files. Only (.dat) (.264) (.avi) (.asf) (.bmp) (.jpg) are available to open.  Video Preview: Preview designate file in verification list. Select the buttons below to play pause II, and stop H the video file. 9.2 Verify Image / Video 1. Select single or multiple files for verification. 2. Click the Verify A button to start verification. 3. The verification result will show on watermark column. If a file was tampered with, it will show Ш; if a file passed verification, it will show . Watermark E Yerificatioii video Previev, File Name Vtemn Start Time End Time Camera Nanne *в091И9.... 2009/11/... 2009/11/... Cameras lmage. if 2009/11/.. а]09/11/ . CanrieraJ Path C:\Documents an C;\Documents an C:\Documeni:s an 
f ГГГ Verification report 4. The verification report will indicate the information related to the verification. 10. External Storage Total recording space of 4 bay unit can be expanded largely by connecting DAS through eSATA port. Follow the directions to enlarge your recording space. 10.1 Create a Volume on DAS The current compatible DAS is AXUS FiT Series. We dont guarantee the quality of other DAS models. Please refer to the manual of AXUS FiT Series to create a single volume on DAS. We are unable to create a volume on external storage in NVR setting page, so do NOT skip this step before connecting to NVR device. 10.2 Create an External Storage 1. Log in to the unit. 2. Click RAID & File System / RAID Management. 3. You will find External SATA Disk displayed in Disk List.
4. Click on the eSATA disk directly to check the disk drive information.  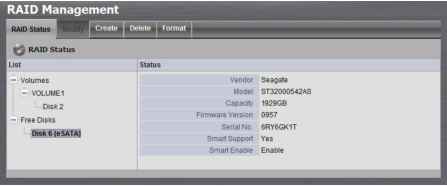 Refer to the section of Create a RAID Volume to create a volume for it. You can either create a volume with eSATA and embedded disk(s), or create an isolate volume with eSATA disk only. 11. Log out Click the Logout button on the top of the page to log out of the system. If there is no action in 10 minutes, the system will log out automatically to avoid unauthorized access. 1 ... 11 12 13 14 15 16 |
|||||||||||||||||||||||||||||||||||||||||||