
8(903)201-21-74
ООО "ЧетыреДатчика"
|
Оператор: 8(903)201-21-74 ООО "ЧетыреДатчика" |
|
Оператор: 8(903)201-21-74 ООО "ЧетыреДатчика" |
Главная страница Titan-nvr manual 1 2 3 4 ... 9 Titan NVR Manual 1.Installation 1.1 Installation Process Step 1: Unpack the Unit This package contains the following items: The unit Quick Start Guide Screws for disk drives Key Power cord Warranty card CD with Install Wizard, NuClient and Offline License Tool application, user manual, and quick start guide The electronic components within the unit can be damaged by Electrostatic Discharge (ESD). Please take precautions at all times when handling the unit or its sub-assemblies. To configure the unit, you must install the software onto a desktop/ laptop running Windows XP-SP3 32bit, Windows 7 32/64bit, Mac OS X v10.6/10.7 Unit front/rear view (Tower) 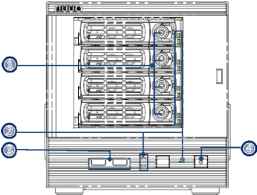 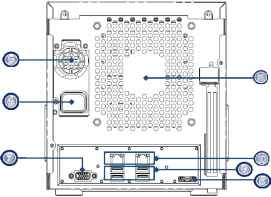   (Rackmount)  1. Key Lock 2. LED Indicators: Power, LAN1-2, HDD1-4 3. USB x2 4. Power Button 5. PSU Cooling Fan 6. Power Connector 7. VGA 8. eSATA Connector 9. USB x 4 10. Gigabit LAN x 2 11. Main Cooling Fan Step 2: Install Hard Drives Refer to compatibility list and install HDDs. For optimal performance consideration, install disks with the same model and storage capacity. The available RAID level depends on the amount of disks installed. 1. Open the lid on the front of the unit enclosure. 2. Pull a HDD tray from the enclosure. See the front view figure. 3. Carefully lock the disks into the HDD tray with screws. 3 screws for each disk. We recommend locking the screws on the bottom of the disk, instead of the side of tray. Put the HDD tray back once you finished. Step 3: Connect to the Network 1. Attach one end of the network cable to the RJ45 network connection. See the rear view figure. 2. Attach the other end of the network cable to your Ethernet hub or switch.  If there are multiple networks at your facility, note the network to which you connect the unit. You will need this information during the setup process. Please also enable the DHCP function within the network, as the unit will retrieve an IP address through DHCP by default.   Step 4: Connect the Power 1. Attach the power cord to the power source. 2. Connect the power cord to the back of the unit enclosure. See the rear view figure. 3. On the front of the unit, press the power button. See the front view figure. It takes about a minute for the unit to fully power up. Once it is powered up, the Power Status LED turns blue. See the front view figure. Step 5: Install the Software 1. Insert the CD into your CDROM. 2. Double-click Setup.exe to begin installation. 3. Follow the instruction of Setup.exe, and click the Finish button to close the installer. Step 6: Set up the Unit The software Installation Wizard performs the setup procedures on the unit. After the procedure, you can begin using it. 1. Go to Start > NUUO Titan Series > NUUO Install Wizard. 2. This program will show the default language setting and initiation mode. 3. Choose your preferred language and initiation mode, and then click the 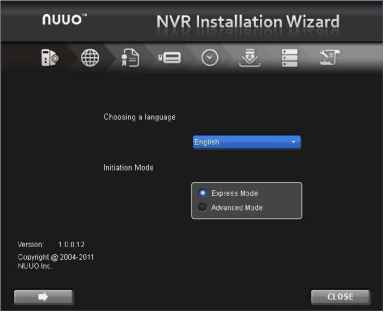 Express Mode: you dont need to set up the network settings, Date/Time and RAID level. Advanced Mode: configure all settings manually: network, license, camera, Date/Time, upgrade notification, and RAID level 4. The Installation Wizard program starts searching for all the units on the internet currently. Choose one of them, and then click the \м button. nuuo NVR Installation Wizar I MAC 1c:6f:65:b8:bb:23 I IPAddres 1 92 168.3.206  I ИаНеГ 1:48:69:23:11 1 92 168.1.242 Select a server to begin the setting proce 5. Type in the password, and then click the OK button.  The default Administrator password is admin . 6. Name this server and select the network type, and then click the button.   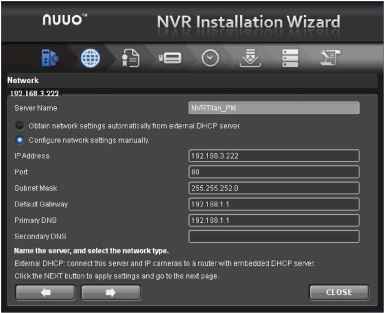 Obtain network settings automatically from external DHCP server: apply all settings which are automatically generated by the DHCP server, such as IP, subnet mask, gateway, and DNS. Configure network settings manually: configure the preferred settings one by one. 7. Activate camera license to have more channel capacity, and click the button.  8. Add cameras for this server. There are two ways of adding cameras, selecting the searched cameras and manually configuring the cameras. Click the 1 button after completing camera list. 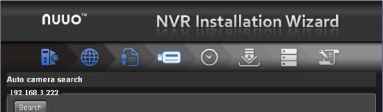 Vendor Model :amera Namideo Channeiinistra Make a camera list for this server by selecting searched cameras. Only cameras supporting search mechanism and being equipped In subnet are searchable Click the Search button. nuuo NVR Installation Wizard Auto camera search 192 1633 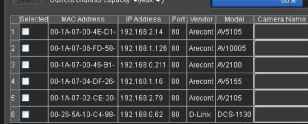 Make a camera list for this server by selecting searched camerasn:! ickthe NEKT button to apply settings and go to the next page. Select camera and type the camera name, username and password. 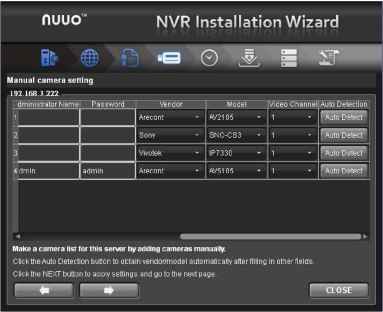 Add cameras manually. 9. Set up the time zone, date, and time, and adjust daylight saving changes if needed. Click the button. 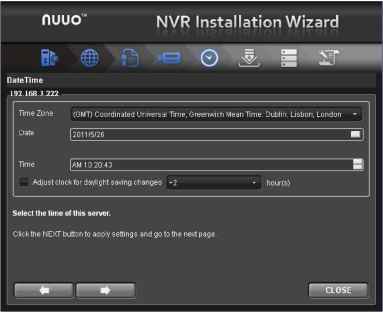 10.Check Enable Upgrade Notification box if you want to receive notification when there is a newer FW version. Click the i J button. 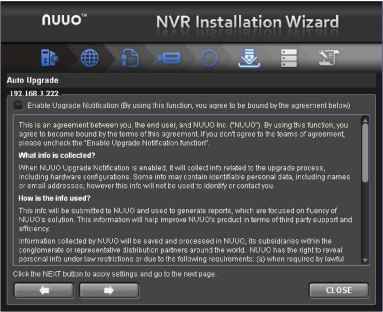 11.Follow the following instruction and select the RAID type you want to create. Click the button.  12.Review your settings. If the settings are correct, click the Finish button to exit the settings procedure and activate the system. 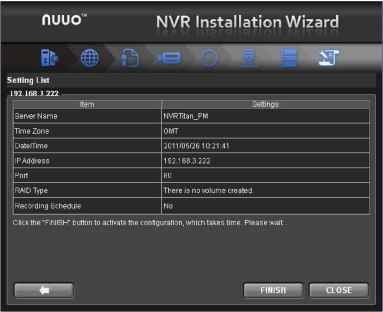 Once the FINISH button is clicked, the unit will start working. In order to ensure the stability of the unit, never pull any disks out when the system is running. 1.2 LED Status Definitions
 2.Settings After setting up the unit, log in to the system by entering its IP address in the browser (Internet Explorer 8 and later, Safari 5.1 7534.48.3, and Firefox 7.0.1). When connecting, choose your language, enter the user name and password, and then begin using this system. Take IE as the demonstration browser of this manual. NUUO Network Video Recorder  There are four main functions of this unit: Settings, NuClient, Help Page, and Logout button. They will be shown on the top of the page. Currently, NuClient is supported on IE and Firefox only. Current firmware version and free storage capacity are shown above the function list. nt-4040(r) > IP Camera > Camera Setti > Camera Parameter Camera Status > Uecorilingi Event > HAlD&ReSysten > 1Ю Settings > Neiworls Eetijp > Management  1 2 3 4 ... 9 |