
8(903)201-21-74
ООО "ЧетыреДатчика"
|
Оператор: 8(903)201-21-74 ООО "ЧетыреДатчика" |
|
Оператор: 8(903)201-21-74 ООО "ЧетыреДатчика" |
Главная страница Titan-nvr manual 1 ... 3 4 5 6 7 8 9 Sef\ice started Sef\ice stopp&d Disk abnormal DDNS updated Recycle event log started Recycle event log stopped Recycle event log fail Motion started Motion stopped Recording on manual started Recording on manual stopped Recording on schedule started Recording on schedule stopped Auto backup started Auto backup stopped Auto backup failed Manual backup started Manual backup stopped Manual backup failed Export started Export stopped Export fail Input signal on Input signal off Output signal on Output signal off Unit connection lost User log on User log out  2.6.10 Save Unit Configuration Save configuration can let you save the settings of this unit. These settings can be applied to other units, which will let you set other units more easily. 1. Log in to the unit. 2. Click Management / Save / Load Configuration. 3. Click the Save Configuration tab. 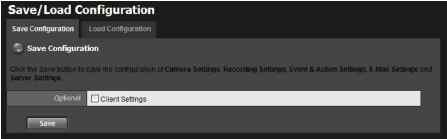 4. Check the box of Client Settings if you want to keep the configuration. 5. Click the OK button. 6. The configuration file will be generated into the chosen folder. 2.6.11 Load Unit Configuration / Default Settings Load configuration can let you apply another units settings to the current unit; Load Default Settings will revert all of the units settings back to the default factory settings. 1. Click Management / Save / Load Configuration. 2. Click the Load Configuration tab.  3. Follow the direction to Load Default Settings or Load Configuration. For the former, uncheck the box of Network Settings to keep the current IP address; for the latter, check the box of Client Settings if you want to restore the configuration. 4. Click the Load button. 5. A confirmation dialog pops up. Click the OK button to begin to load the settings into your unit. If the saved configuration is without client settings, selecting loading configuration with client settings will lead you get the default. The original client settings (if any) are covered and untraceable. User account and privilege will be kept even if loading default settings, while   camera settings, recording schedule, event & action settings, E-mail setting and server settings wont be. RAID information will always be kept whether loading default settings or loading configuration. If you select to load default IP, system may guide you to the defaulted IP. However, if the guiding mechanism is failed, please try Installation Wizard. 2.7 System 2.7.1 View System Information 1. Log in to the unit. 2. Click System / System Information. 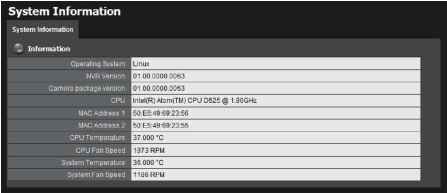 The system information includes the following items. Operating System: Embedded Linux NVR Version: NVR system version Camera package version: Camera package version CPU: CPU model number MAC Address 1: First MAC address of this unit MAC Address 2: Second MAC address of this unit CPU Temperature CPU Fan Speed System Temperature System Fan Speed 2.7.2 Smart Fan Control 1. Log in to the unit.  2. Click System / System Settings. 3. Click the Fan Control tab. 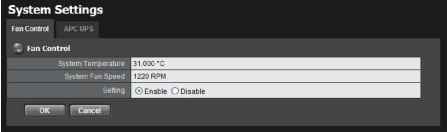 4. Check the Enable or Disable option. 5. Click the OK button. 2.7.3 UPS Setup This feature enables you to tell your unit how long to run on APC Uninterruptable Power Supply (UPS) battery power and when to shutdown, after power failure. 1. Attach the APC UPS to one of the units USB ports. 2. Log in to the unit. 3. Click System / Settings. 4. Click the APU UPS tab. 5. Check one of the options: System Settings , InfoniiatlDn Smart-UPS 3000FWe55, 1B.DUSB FWr7.4 System shutdown as powerof fheUPS remaina 1 System shutdown as Disable: Run until the UPS battery is depleted System shutdown as power of the UPS remains %: Run until the UPS battery remains this percentage. System shutdown as power of the UPS remains min.: Run until the UPS battery remains the certain period of time. 6. Fill in the specific value if you choose the last two options. 7. Click the OK button. 2.7.4 Upgrade the System 1. Log in to the unit. 2. Click System / Upgrade. 3. Click the Firmware Upgrade tab. System Upgrade Upgraae Notircafion  У 4. Browse the FW for upgrading and click the OK button. 5. A confirmation dialog pops up. Click the OK button to start upgrade process. 6. After upgrade, the system will restart. You need to re-access the unit again after this. 2.7.5 Upgrade Notification Enable this function to allow us to notify you automatically when there are firmware updates (Recommended). This will help keep your system up to date. The updater will also collect info from your system that will be used for future system improvements. 1. Log in to the unit. 2. Click System / Upgrade. 3. Click the Upgrade Notification tab. 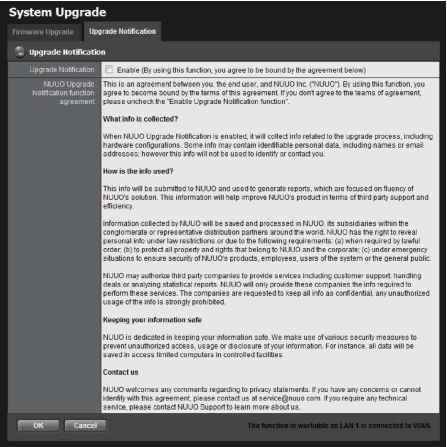 4. Check the option if you agree to be bound by the agreement. 5. Click the OK button. The function only works as LAN 1 is connected to WAN, or our FW management server is unable to detect the current version of your systems. 2.7.6 System Date and Time Setup 1. Log in to the unit. 2. Click System / Date/Time. 3. Click the Setup tab. 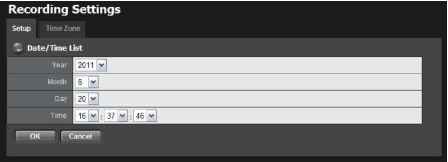  4. Choose the year, month, day and time. 5. Click the OK button to restart the system to activate the changes. When you modify the date or time of the system, the system may find the wrong data when searching the recorded data. Backup the recorded data before changing the time. 2.7.7 Daylight Saving Time Setup 1. Log in to the unit. 2. Click System / Date/Time. 3. Click the Time Zone tab. 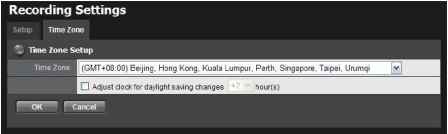 4. Check the Adjust clock for daylight saving changes option and select the time change of daylight saving time in your location. 5. Click the OK button. 2.7.8 Local Display Titan NVR supports VGA out by connecting the D-SUB of the unit with a screen to watch live videos. You can do some operations on the monitor, such as switching grid layout and enabling auto scan, but you have to configure the settings on web. Please follow the steps to set up local display. 1. Log in to the unit. 2. Click System / Local Display.  Local Display Lccal Display Channel (max. 1B) Default GrldLavout 0Ch2 0Ch3 Hchit 0Ch5 0Ch6 0Ch7 EchB 0СП1О 0chii Исшг 0СГ113 0cni4 0cni5 Ecme :.,.;-Cfl18 Ch19 Ch20 Ch21 Ch22 Ch 23 Ch 24 nai26 Ch27 Ch28 Ch 29 СИЗО Ch 31 Ch 32 Default Start Auto Scan □ □ate 2011/0223 □ Time IPM06:39:00 W Local Display: Check the box to enable local display. (default: checked) Local Display Channel (max: 16): Select the channel you want to display. (default: 4 ch) Screen Resolution: Choose the resolution of screen display; the selections of resolutions will be shown when connecting with a screen. (default: auto; auto implies the best resolution system detects) Default Grid Layout: Choose the defaulted layout. (default: 2x2) OSD: Check the box to enable OSD of camera name. (default: checked) Toolbar Display: Choose to hide the toolbar or always show it on the screen. If you choose Hide , toolbar can still be shown when moving the cursor. (default: hide) Display Date/Time on Toolbar: Check the boxes to display date/time on toolbar and change the formats if necessary. (default: checked) Fix Aspect Ratio: Check the box to make all videos fix the aspect ratio. (default: unchecked) Default Start Auto Scan: Check the box to enable auto scan when liveviewing. (default: unchecked) Auto Scan Interval: The time interval of auto scan. (default: 5 sec.) 3. Click the OK button. 2.7.9 Restart the Unit 1. Log in to the unit. 2. Click System / Reboot/Shutdown. Recording Settings 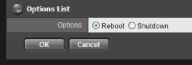 3. Check the Reboot option. 4. Click the OK button. 5. A confirmation dialog pops up. Click the OK button to reboot the unit. During system restart, none of your files will be accessible from your desktops/laptops. 2.7.10 Shut Down the Unit The only time you need to shut down the unit is to replace the disk drive cooling fan or the power supply. During and after the shutdown, none of your files will be accessible from your desktops/laptops. There are two ways to shutdown the unit. Shutdown by Software 1. Log in to the unit. 2. Click System / Reboot / Shutdown. Recording Settings  3. Check the Shutdown option. 4. Click the OK button. 5. A confirmation dialog pops up. Click the OK button to shutdown the unit. Direct Shutdown 1 Press the power button and hold it for 5 seconds to force to cut off the power directly.  3.I/O 3.1 Introduction 3.1.1 System Introduction NUUO provides remote I/O solution for NVRmini/NVRmini 2/Titan NVR by connecting SCB-C31 with NUUO I/O Box SCB-C24/26/28. Refer to the below architecture, I/O device is connected directly with I/O Box, and input/output signal delivered in RS485 format are converted to Ethernet through SCB-C31. NVRmini/NVRmini 2/Titan NVR can use the signals to do more sophisticated setup, such as starting recording when input triggered, triggering output as an event happened, and much more. 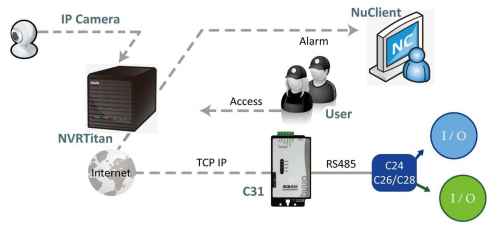 3.1.2 HW Installation SCB-C24/26/28 must work with SCB-C31 (Ethernet-RS485 converter). Further, the C31 Box cannot be used for POS and converter at the same time, and one C31 Box can be paired with one NVR unit only. Please follow the steps below to configure the devices. Step 1: Check the system switch of SCB-C31 is switched to OFF-OFF position. Step 2: Connect SCB-C31 with power source. Step 3: Connect SCB-C31 with internet by RJ45 LAN cable. Step 4: Connect I/O Box with power source. Step 5: Connect SCB-C31 and I/O Box with cable, positive connection (TX+/D+ and DATA+) and negative connection (TX-/D- and DATA-). Take SCB-C31 with I/O Box SCB-C24 for example as below. 1 ... 3 4 5 6 7 8 9 |